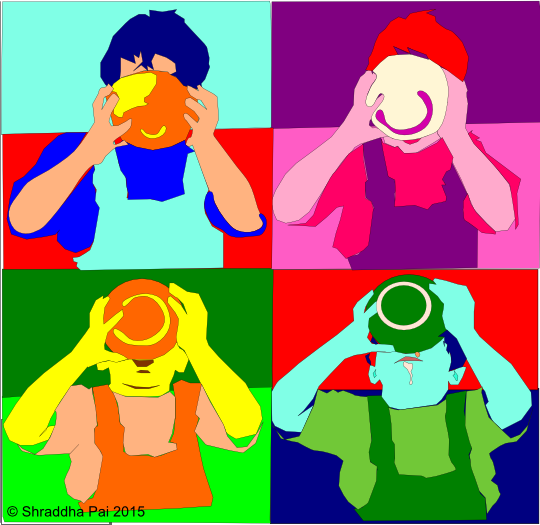
Here is the draft of our family’s design for our street’s Advent-inspired fundraiser DailyFlag for Daily Bread this December. It’s titled “Drink. Up. Your. Soup!”. Not that the subject in question appears to need any urging.
This is the 5th year of the DFfDB fundraiser, a great community-based art installation on our street in the Beaches area of Toronto. Twenty five families unveil their designed flag on their assigned day in December; the flags must have the number represented in the design. The flags are auctioned on the DFfDB website, and all proceeds go to the Daily Bread food bank in Toronto. I look forward to the immense creativity of my neighbours, and the street seems increasingly festive as December proceeds. Last year, we raised $26,400!
Our design last year featured racooons enjoying Christmas atop the iconic Leuty Lifeguard Station.
This year’s design was inspired by this sequence of 4 photos I took of my 3 year-old son. It was a chilly day in March; he had just returned from a soccer session and seemed to really be digging his soup at the local Dufflets.

I just love how he couldn’t have enough of the soup, the bowl just kept tipping on up!
The style is a nod to Andy Warhol’s “Colored Campbell Soup Can”, apropos because of the similar theme. But also I thought it would be stylistically neat to have the palette change in each frame.
I’m executing the design in appliqué again this year. The bright colours just pop!, and the medium has depth because of the 3D-ness of the fabric. (Sneak previews in the next blog).
The steps are mostly similar to that with the racoons last year. All the graphics work is done in the most excellent graphics program, Inkscape (open source and free!).
Step 1: We want a multicoloured image, so we need to convert it into a colouring book style (set of convex polygons).
My first attempt was to apply a Warhol effect to the image using an online tool, and then convert that to polygons in Inkscape. Wrong: too many blobs, pictures weren’t clear, and drawing all those polygons took way too much time.
 Appliqué nightmare!
So I redid the polygons; sometimes an overhaul is best. I directly took each picture in turn and manually drew polygons for each segment in the picture. Doing this for all 4 pictures took about 2.5 hours or so – pretty quick really, considering, and my Wacom stylus helped.
Here is a shot of the polygon layer and the photo underneath it. I used the Bezier curve tool (Pilot pen-like nib in the icon) for the basic polygons and then curved selected segments using the “Edit Paths by Nodes” tool (second from top icon in LHS toolbar).

Step 2: Now that we have our 4 images, we need to pick colour schemes for each panel. The colour schemes must contrast – part of the charm of pop art – and no colour should dominate. Because each colour translates to felt of a specified colour, I also kept the shades of colours consistent across panels. e.g. If the light blue is cyan in panel 1, it should also be cyan in panel 4, and not cerulean. So then we just buy the cyan felt, and not the cyan and the cerulean. And we go just a little less crazy.
The result was what you see above, and it took a lot of tinkering.
Step 3: Logistics. Now we move from concept to execution. I compiled a master list of felt colours we needed. We decided that 2.5 sq.ft was the size we wanted for the final piece, a piece cozy enough to hang by a kitchen, perhaps. We then calculated how much of each felt piece we needed. I probably could have done with just 0.25-0.33 yard each, but of course I overbought. I supplemented the acrylic felt from my local Fabricland with some nice wool felt I bought last year from Magic Cabin, especially for smaller pieces or certain colours (fuschia for panel 2). In the list below I roughly categorize amount by the number of “+”s (+ is some, ++ is most)

That’s it for now! In the next post, I will outline the steps to create the appliqué pattern and share some previews of finished panels (of which there are already two! Yea for planning ahead!).
I will also share the joy of cutting arbritarily-shaped pieces in different colours, a veritable jigsaw puzzle, and assembling it for the appliqué stitching. Till then!
This is just terrific Shraddah!