
Here is my second attempt at a men’s shirt, this time more successful. This is a McCall’s M6044 men’s shirt pattern, very popular for this kind of garment. I tried the variation with contrast lining for the collar and sleeve. The fabric is from the “Cotton+Steel”‘s Rotary Club collection and is called “Ring Ring Red Navy”. The look for this one was geometric overload, and I picked a contrast lining that was primarily blue to complement the infrequent navy in the main pattern.
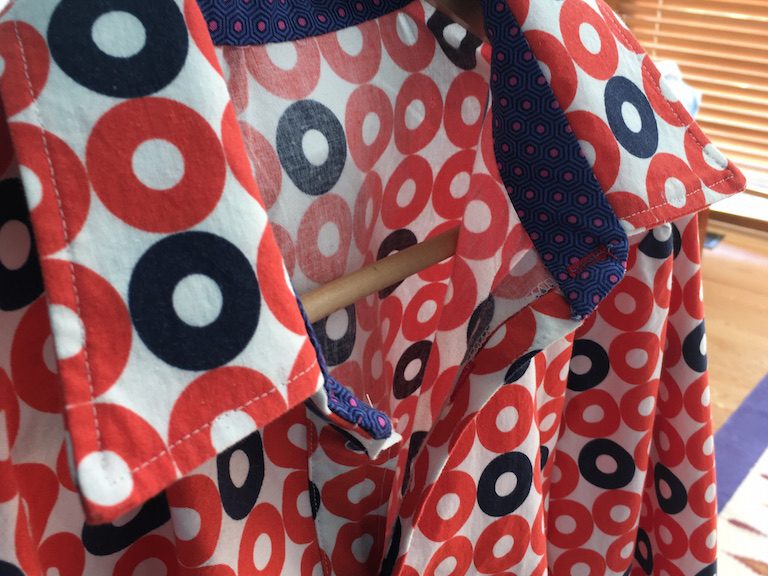
Here is the look of the collar:
 and the sleeve. You can see the contrast pattern is also suitably geometric, with concentric hexagons.

About a couple years ago, I attempted the Walden Negroni for a shirt but the construction of the double yoke resulted in an Escher-like tangle which I couldn’t salvage.
The McCall worked much better and I think I will keep this pattern as my primary shirt pattern before I brave the Negroni in the future.
Here are some more views of the shirt. Here’s one from the front:

Side (picture’s fuzzy):
and the back:

And here’s the shirt all by its lonesome, without someone sweet to fill it:
Lessons Learnt (or what I remember, anyway)
I have to say, it’s been a busy year with major home renovations, family trips abroad and an unusally busy project load at work. So this project got interrupted far too many times and I definitely lost the flow. This shirt was originally supposed to be last year’s Christmas present(!), then a birthday present (January),… but hey, at least it’s done within the year.
Chalk markings: I definitely did lose all the chalk markings on the initial fabric, and putting the chalkmarks after the seam allowance (present on the pattern ) disappears involved some improv. Lesson: Store the project in a way that keeps the chalk marks. Make bolder chalk marks and make them from the get-go!
Collar: Another thing I recall is that making the collar was dicey. I cannot remember exactly what happened but I had to really stretch the lining on the inside to make it fit snugly. Mercifully it worked this time but something to be more mindful about the next time around.
Sewing buttons: this was supposed to be easy.. and eventually it was. Having chalkmarks align (see previous comment) is super important so the button and holes line up. It’s important to have the button hole be 1.5″ longer than the button, because otherwise it’s really hard getting the button through. Cutting through the buttonhole was hard, mainly because the placket had so many layers of fabric. I needed a fresh, sharp seam ripper to cleanly cut the button holes. And be wevy, wevy careful not to go past the button hole. In fact I had to come back at the end and redo the stitching around at least 3 buttonholes to make sure it looked clean!
I think I need to make at least one more shirt without interruptions before I decide how straightforward this project is.